
Back in the summer, after attended the school open house. The teacher sent a new note home with the supplies that missed out from the list. One of the supplies was a ring binder pencil case. S and I quickly made another trip back to the store and hope to find one. S stood in the school supply section for over an half hour and couldn't find the one that she is satisfied! Then she tipped her head on the side and looked at me..UMMMM Then asked me, mommy do you think you can make one from you fabric stash? Without a second though, I replied, OF COURSE! {i was actually hoping and waiting for her to ask me}. On top of my head, I knew that I need the clear vinyl to make the magic!We walked to the fabric section and bough 1/4 yard of clear vinyl. After return home, I jump right in the studio and started
{the project}. I had a few failed to start with, but S loves it! Last month, I worked and improved the pattern again and made/ adjustments on the pattern. I thought it would be great to make lots window pouches for the holiday season as gifts.These window pouches are ready to gift to S' teachers as holiday gift and nieces back home and will be stuffed with all kind of chocolates and fun things! These are easy to sew up and you could make one in half hour or so!
Let's get start!

Supplies:
-Sewing machine
-Coordinate thread
-10" nylon zipper
-Medium weight fusible interfacing
-Clear vinyl
{I purchased 1/4 yard of clear vinyl. It will least for a long time if you only use small portion on the projects}
-Linen and Cotton blended fabric
{If you use 100% quilting weight cotton, I would recommend to use heavy weight fusible interfacing instead}
-Iron
-Ironing board
-Rotary Cutter
-Ruler
-Be-Gone pen
Measurements for making one 5.5"x8" Window Zippered Pouch
Cut ------
Linen and Cotton blended Fabric { *indicated as
A fabric in the following description}
4 pieces of 1.5"x3"
4 pieces of 1.5"x8"
2 pieces of 5.5"x8"
Medium weight interfacing {* indicated as
B fabric in the following description}
4 pieces of 1"x2.5"
4 pieces of 1"x7.5"
2 pieces of 5"x7.5"
Clear Vinyl
1 piece of 3"x6" { *indicated as
C fabric in the following description}
Binding
Cotton fabric cut 1.75" x44"
Linen and Cotton blended fabric cut 2.25"x44"
Zipper
10" nylon zipper
Seam Allowance
1/4", unless noted!
Prep. Time: Bring all the
*A and
*B fabrics out then fuse the
*B fabrics onto
*A fabrics. As you can see, the
*A fabric left with 1/4" seam that's unfused.
Completed all the ironing process for
*A and
*B fabrics
Use Rotary Cutter and cut one piece of 3"x6" *C fabric for the window.
Checking time!! Do you have all your "fabrics" ready to go before the next step?
Step 1 -Bring two pieces of 1.5"x3" *
A fabric out
-Sandwich the *
C between two pieces of *
A fabric
Step 2 Lined edges of *
A and *
C together
Step 3 Sew with 1/4" seam allowance
Step 4 Now, bring the two *
A pieces together
Repeat step 1.2.3.4 for the other side of the *
C
Step 5 Bring two *
A pieces together then top-stith close to the join edge; repeat for the other end.
Step 6 Bring two pieces of 1.5"x8" *
A pieces out; sandwich the *
C in between
Step 7 Use sewing pins on the side to stable the 1.5"x3"
*A fabrics. Sew with 1/4" seam allowance; repeat for the other end.
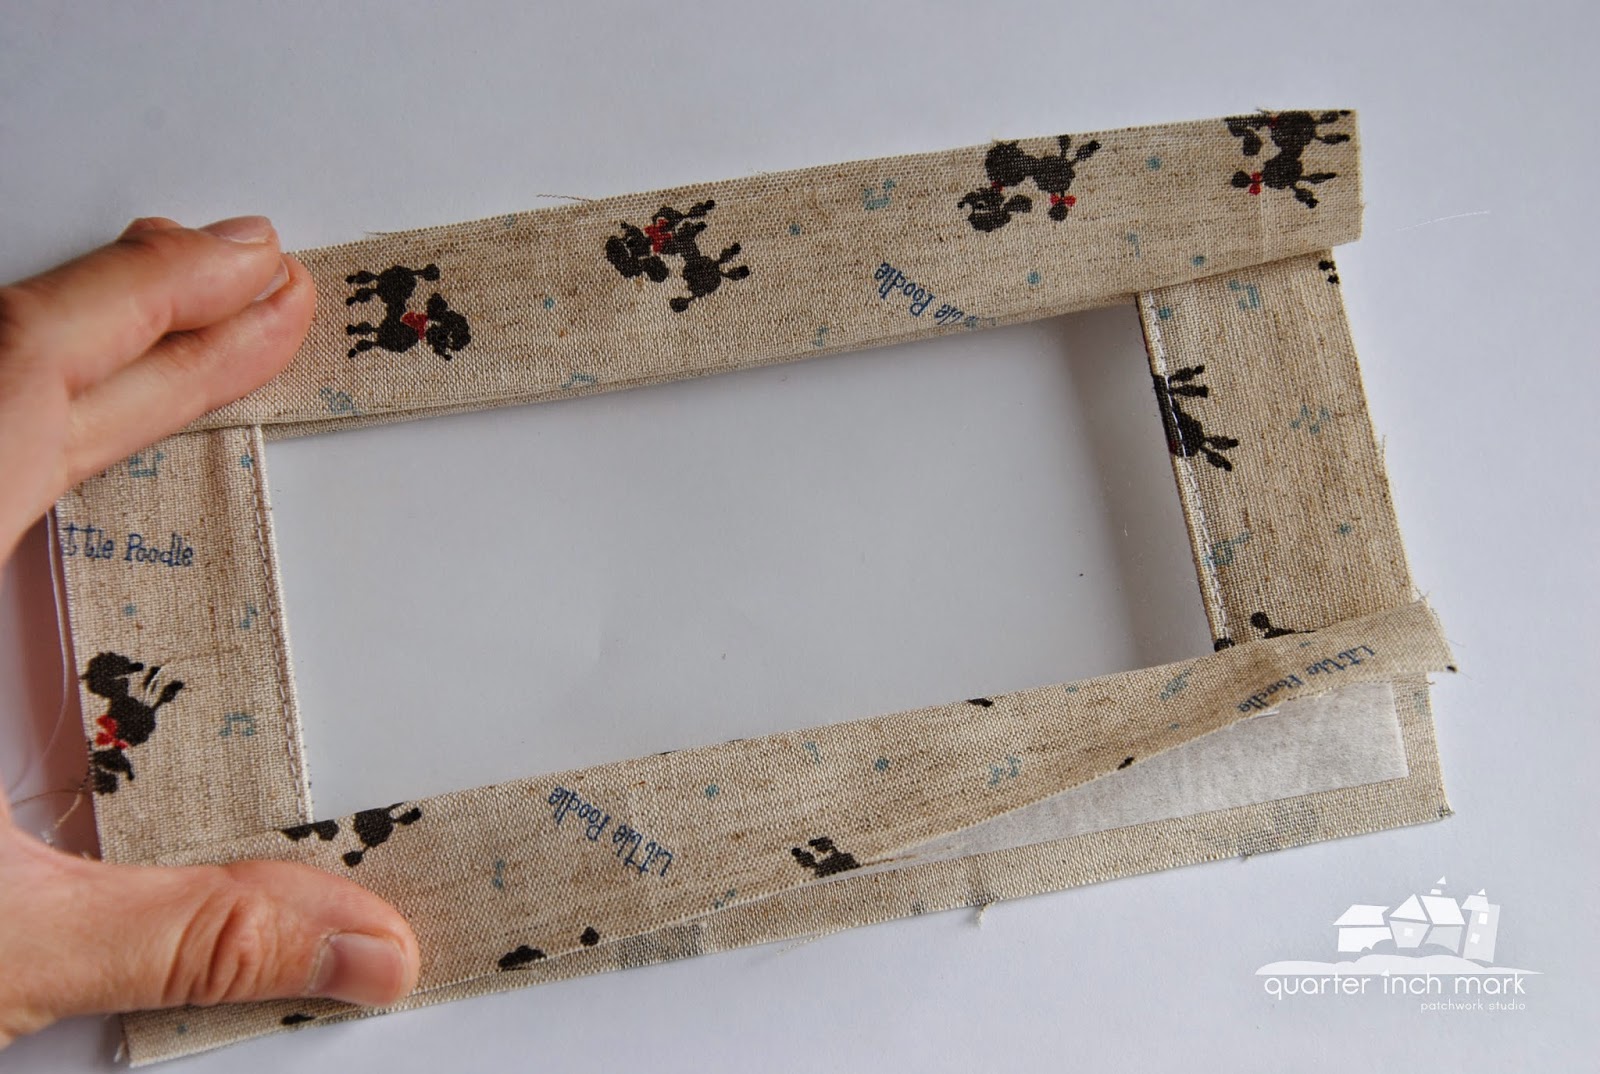
Open both end of the *
A pieces.
At this point, the window is framed!
Step 8 Top-stitch along the edge of the 1.5"x3"
*A fabric. You will need to flat the edge a little before top-stitch. The edges are getting "thicker" at this point, so you may enlarge your stitch length to make the sewing easier! And you have your "Front" pouch finished!!
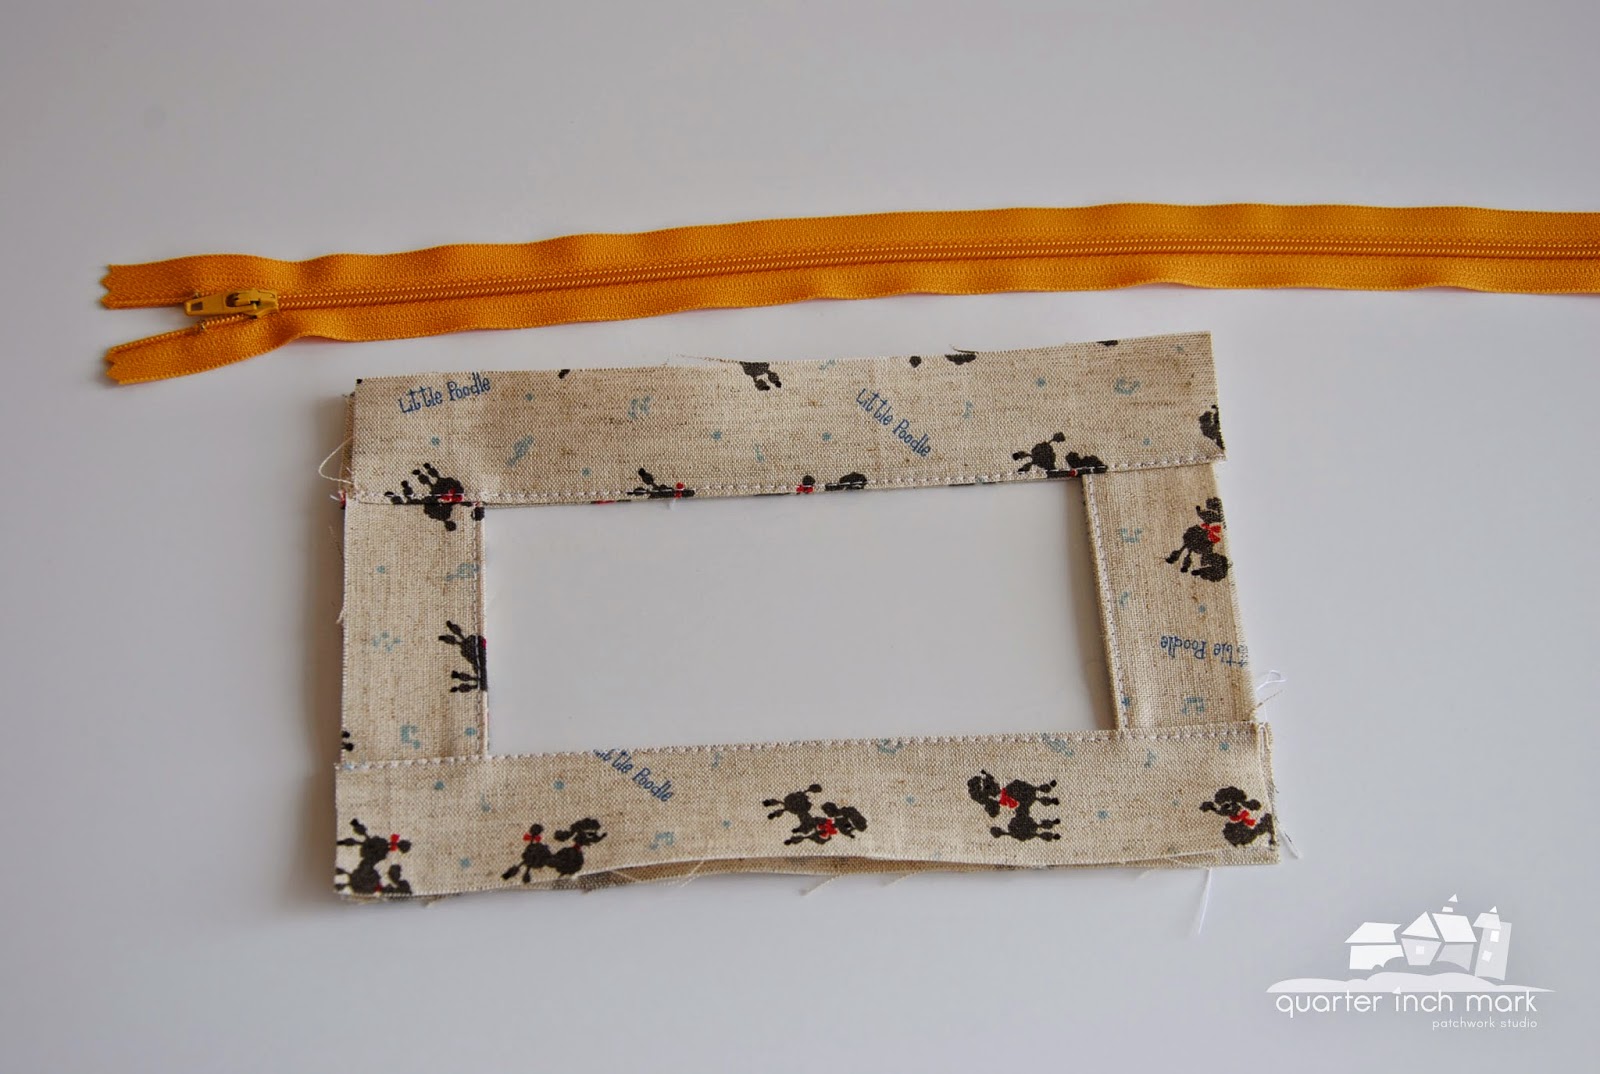
Bring the zipper out, we are ready to install zipper onto the "front" piece
Step 9 Place zipper face down, as shown on the above photo
Step 10 Line the zipper onto the edge of ONE piece of 1.5"x3" *
A fabric
This is what it looks like
Step 11 Sew the zipper onto the *
A fabric
Step 12 This is a tricky step, but follow along... After attached the zipper onto the
*A fabric; "fold" the sewn side of zipper inside of the
*A fabric
This is what is looks like!
Step 13 Gentle press with warm iron {no steam} on the zipper and
*A fabric, DO NOT Iron on any part of the *
C
Step 14 Now we'll be working on the opposite side of
*A fabric that's without zipper
Step 15 Iron/ fold the 1/4" seam allowance inside of the
*A fabric; shown on above photo
Step 16 Bring two ironed
*A pieces together; the image shown above is the the opposite side of the from piece ( see the zipper is wrong side?)
Step 17 Sew on the zipper side edge of two ironed *
A-1 and *A-2 pieces together. You will need to make sure you have catch/ sew the back *
A-2 piece that has been ironed {Front piece window shown above}.
Step 18 Top-stitch along the edge to reinforce the edge { The shown image above is the back of the front window piece. Check you'll get a clean look of the edge; no Raw edge since you have ironed and folded in the raw edge inside}
Step 19 Bring out two pieces of 5.5"x8"
*A fabrics
Step 20 Place the one piece of 5.5"x8" of *
A fabric that you would like the window look through; Right side up
Step 21 Place the second 5.5"x8"
*A fabric RIGHT side out { It would be the printed side}
Step 22 - Sandwich the three pieces together { Front/window piece, 5.5"x8" A-1 piece that window look throughout, 5.5"x8" A-2 piece that in the back}
- draw lines cross the zipper
- Pin layers together
Step 23 Use 1/8" seam allowance sew perimeter of the pouch; it is the idea of baste the layers together, just like sandwich a quilt.
This is the form of the window zippered pouch; we are getting there!
Step 23 Clip the excess zipper ends;
don't use your fabric scissors
Step 24 Making Binding Tape; here are two methods that I'd like to share.
For the Cotton binding tape:
Cut 1.75"x44" fabric strip; fold the strip in half; press with hot iron then bring the two edge of binding tape to the center press with hot iron. Or you can use a bias tape making to do so.
For the Linen and Cotton blended binding tape:
Cut 2.25"x 44" fabric strip; fold the strip in half; press with hot iron then fold the tape in half again and press with hot iron. When using the linen and cotton blended fabric as binding tape you will notice it is thicker and you'll need to adjust your sewing seam allowance to 2/16" instead of 1/4".
This is the cotton binding tape I made and you can check in and see the folding lines
Step 25 Attach the binding tape onto the zipper pouch. Line the binding tape along with the zippered pouch then sew on the far right side of folding line
Just like making a quilt binding, you make a 90 degree fold on the corners that you sew that would give a nice corner folds!
Step 26 Fold the two ends of the binding tape together then press with fingers to create folding lines
Step 27 Use Be-Gone pen and drew the folded line that you create on both side of the binding tape
-Pin the two pieces together or hold together if you feel more comfortable without a pin
Step 28 After a few attempts that I found if gentle fold the pouch in half way and bring the binding tape out is easier to sew the two ends together or you will need to ripped off the binding tape to give more room to sew two ends together.
Step 29 Now the binding tape is attached!
Step 30 I used clips to hold the binding tape that I folded in; if you don't have clips don't worry! You'll still fold the binding tape in and can use pins to pin the binding, but be very careful!
Step 31 Sew around the binding tape!
Step 32 HAPPY HOLIDAY!!
I hope you enjoy this new tutorial as much as I make/write it! If you are thinking to make a larger size or make a ring binder pencil case. You will use the same method, but enlarge the window size. I used 2.5" on the
*A fabric cuts! You also will need to purchase the hardware to install the holes. You can find these hardware in most of the local craft stores. I love how the window shows little bits this and that! I am also so happy to share this new tutorial with you during this holiday season! It is a way of my {Thank You} to your time to come here to support and encouragements!
Enjoy
xxc
P.S. This is tutorial is for
PERSONAL use only and proper credit given is so much appreciated!
P.S.S I need to apologized for another day late! We have had friends here in the city! I spent a very pleasant day with my dear friend yesterday; shop in craft stores, chat about fabrics, and had very delicious lunch together! Then Julie is in town for the holiday shopping, we had Julie's special soup, tasty pound cake{s}, and lots catch up! Oh.. when we got home was late for us. More soon!


so adorable... thank you for the tutorial, Chase ... I always love your fabric choice. Have a nice weekend guys, hope you have a plenty of sun to enjoy.. we don't have sun for almost a week now, I don't like it .. its just grey.. looks so sad ..
ReplyDelete1/4" Mark: Tutorial: Window Zippered Pouches >>>>> Download Now
Delete>>>>> Download Full
1/4" Mark: Tutorial: Window Zippered Pouches >>>>> Download LINK
>>>>> Download Now
1/4" Mark: Tutorial: Window Zippered Pouches >>>>> Download Full
>>>>> Download LINK OS
great tutorial Chase. Thank you so much for sharing. I'll be giving it a try as soon as I get hold of some vinyl.
ReplyDeleteThanks a lot for that great Tutorial :*
ReplyDeleteI love your pictures, every step is perfectly shown!
Have a wonderful Second Advent !
Greetings from Germany,
Karin
Thanks, Chase, for a very helpful tutorial! I can't wait to make some of these!
ReplyDeletethese are super cute! thanks for sharing : )
ReplyDeletegreat tutorial ! Thanks, I'm saving this post!
ReplyDeleteGreat tutorial thanks for sharing!
ReplyDeleteExcellent tutorial! I will be making several of these little pouches for Christmas gifts! Thank you!
ReplyDeleteThanks for the lovely tutorial, Chase! It's very, very clear. And of course your photography always helps so much! Love these sweet little pouches… xoxo
ReplyDeleteGreat idea and inspiration!
ReplyDeleteThank you so much! These pouches are so cute, I can hardly wait to give it a go! Lovely tutorial...you are so kind to share this!
ReplyDeleteThank you ) Great tutorial!
ReplyDeletethanks for another great tutorial
ReplyDeleteVielen Dank für das ausführliche und schöne Tutorial.
ReplyDeleteLiebe Grüße, die Bildersammlerin!
Beautiful and a wonderful idea for gift giving! Thanks so much for your awesome tutorial, Chase. Happy Holidays to you and sweet S!
ReplyDeleteThank you so much for the tutorial. It`s so easy to follow
ReplyDeleteElisabet in Sweden
Your creations are beautiful, as always! Thank you for sharing the tutorial!
ReplyDeleteI just found your blog through s.o.t.a.k handmade! Love these little pouches and can see me making quite a few as gifts! Thank you so much for the tutorial!
ReplyDeleteZoe Madison: Thank you very much !! A fabulous tuto
ReplyDeleteFound you on Pinterest. What a wonderful project. Thanks so much for the FREE tutorial/pattern. Very generous. And I will certainly be trying this. Love it!
ReplyDeleteCan't Wait to try this turtorial. So Lovely pouches. Thank your for sharing.
ReplyDeleteI kept on wondering what would emerge if these folks could all see each other's ideas)
ReplyDeletesmell proof weed case
1/4" Mark: Tutorial: Window Zippered Pouches >>>>> Download Now
ReplyDelete>>>>> Download Full
1/4" Mark: Tutorial: Window Zippered Pouches >>>>> Download LINK
>>>>> Download Now
1/4" Mark: Tutorial: Window Zippered Pouches >>>>> Download Full
>>>>> Download LINK 8y