Showing posts with label feedsack. Show all posts

Thursday, September 7, 2017

A simple tutorial- About Hand Applique


Hello! Happy Fall! You all know Fall is my favorite season at all time! Cool temperature, warmer lighting, sip tea (any time of the day) and best to that is I am knitting like a mad lady lately! ( Maybe that would be another post). Finally I get around to write this simple hand appliqué tutorial for you. I simply like to share what I use for the process and all the tips that I received from other master hand appliqué sewers. 
So, here we go...

Here are some basic tools that I've used and felt they are a good investment for Hand Appliqué. 

Freezer Paper: You can find Freezer paper in most of grocery store. It comes in a long box. One side  
 of the Freeze paper is coating glossy and the other side is paper finish. You'll draw on the paper finished side and adhere the glossy (plastic coating) side to the cloth with a hot dry iron. 

Gutermann 100% Polyester Thread: I love how fine the thread is and very sturdy! But you can use 
most type of fine thread for the hand appliqué purpose. I would avoid 100% cotton thread as I found it doesn't give clean stitch look on the appliqué pieces. 

Crystal clear Ball pins: This is the best type of pins that I found and love it. It comes with two sizes. 
These are fine, sharp and so easy to pin through layers of fabrics. 

Applique Pins 3/4" steel: These pins are pretty thick, but short. The appliqué pin doesn't catch the hand sewing thread easily because it is short. I use maybe 3-4 pins through out the entire applique pieces. 

Hera Marker Slim: This is a great investment for any type of sewing. The slim Hera Marker
comes with a sharpie point side that allows you to "tuck" the seams in and the opposite side's top comes in a small angle that can make marks on cloth easily. 

Pen : More like mechanical pen.  It allows to draw on the cloth easy and gets clear and accurate lines. 

Appliqué Sharp Needles: Get a pack of these needles! They are probably by far the best hand              
sewing  needles that I've been using for years to come. I love the length and the thickness of the needles! But if you have some sewing needles around you can just use what you love! 

Water Soluble Ink Pen: When you draw on cloth you want to make sure that you'll get to your project within a week or two or some of the drawing lines will fade away due the the moisture in  
the air. 

Scissors:  A small pair of scissors that's sharp and allows to cut clean edges. 

Trash Bowl:  I have a few of these trash bowls on the table. When work on hand appliqué there will  some small cuts to make and thread to clip. I keep them in the bowl then clean after finish. 


Step 1: It is important to scale the pattern to the desire sizes. If you are a beginner, I recommend to scale appliqué pattern to a large percentage, so you can get some good practice before small scales, so you don't feel discourage!


I like to talk about this LED light Pad! I love it here! When my old-time light box didn't work as I hoped, I began to search for a Light Box, so I can have it around and even though about to build one. But I came cross this LED light pad last year when I was working on an illustration project. It does most of the tracing trick for me, even on fabric! This is really a personal preference for investing a new tool. I've shared with S for her drawing, so it is a good investment for us!

How this work? It doesn't have a plug! You'll insert USB core into a computer (where USB is at) or a power bank. Simply touch the turn on button on the left and the light will come up. Make sure stay in a darker environment for better image showing.  It is pretty thin and light weight, too!


Step 2: Place the appliqué pattern to the light pad ( I used a small piece of washi tape to held the pattern in place). Lay a piece a Freezer paper ( Big enough for the pattern) on top of the appliqué pattern. Use a pen to trace images. You'll want make sure you do a good job in tracing the pattern because these are becoming appliqué templates for each piece. 

Finish Tracing Pattern on Freezer Paper

Step 3: Keep the appliqué pattern on top of light pad. Place the appliqué background cloth on top of the pattern. Use water soluble ink pen to trace images onto the cloth.  

 Step 4: Now you shall have traced the pattern onto cloth and freezer paper.

Step 5: This is an important step before starting hand appliqué pieces. I always study the pattern before I start; making indications of first, second, third. What does that mean? You ask? Appliqué is a like cut and paste process to a project. Only here, we use cloth instead of paper, we use thread instead of glue. So when you are layering your pieces down you want to know which one goes first  then second then third.

Clover mini Iron: This is another really cool tool that I like to share with you. I have had this mini iron about 7 years now! But I rarely use it the first couple of years because it is somewhat dangerous around small children.

How this mini iron works? The mini iron comes with an attached plug and a little turn just below the metal part to turn the iron on. It takes 3-5 minutes to heat up the top. However, thhe whole top that made from metal is "HOT". I have burn myself a few time because had it sat so close when I work. The little rest stand gets hot as the metal top is rest on that. So, be so careful after you unplug it. Let is sat a good 10 minutes before putting it away.

I have to say this is a pretty amazing tool when it comes working with appliqué pieces, but I always ask to be leave alone when I am using it.


Step 6: How I like to start the appliqué pieces. I always like to start with image that takes maybe two or three pieces to make into one appliqué image.  The small tulip comes with three small pieces, so it is ideal for a start.  Cut the individual freezer paper pieces out.

Step 7: Adhere the freezer paper piece to the RIGHT side of the cloth that you have planned. 

 Step 8: Repeat for other two pieces.

 Step 9: Single thread the appliqué sharp needle. Make a small knot at the end.

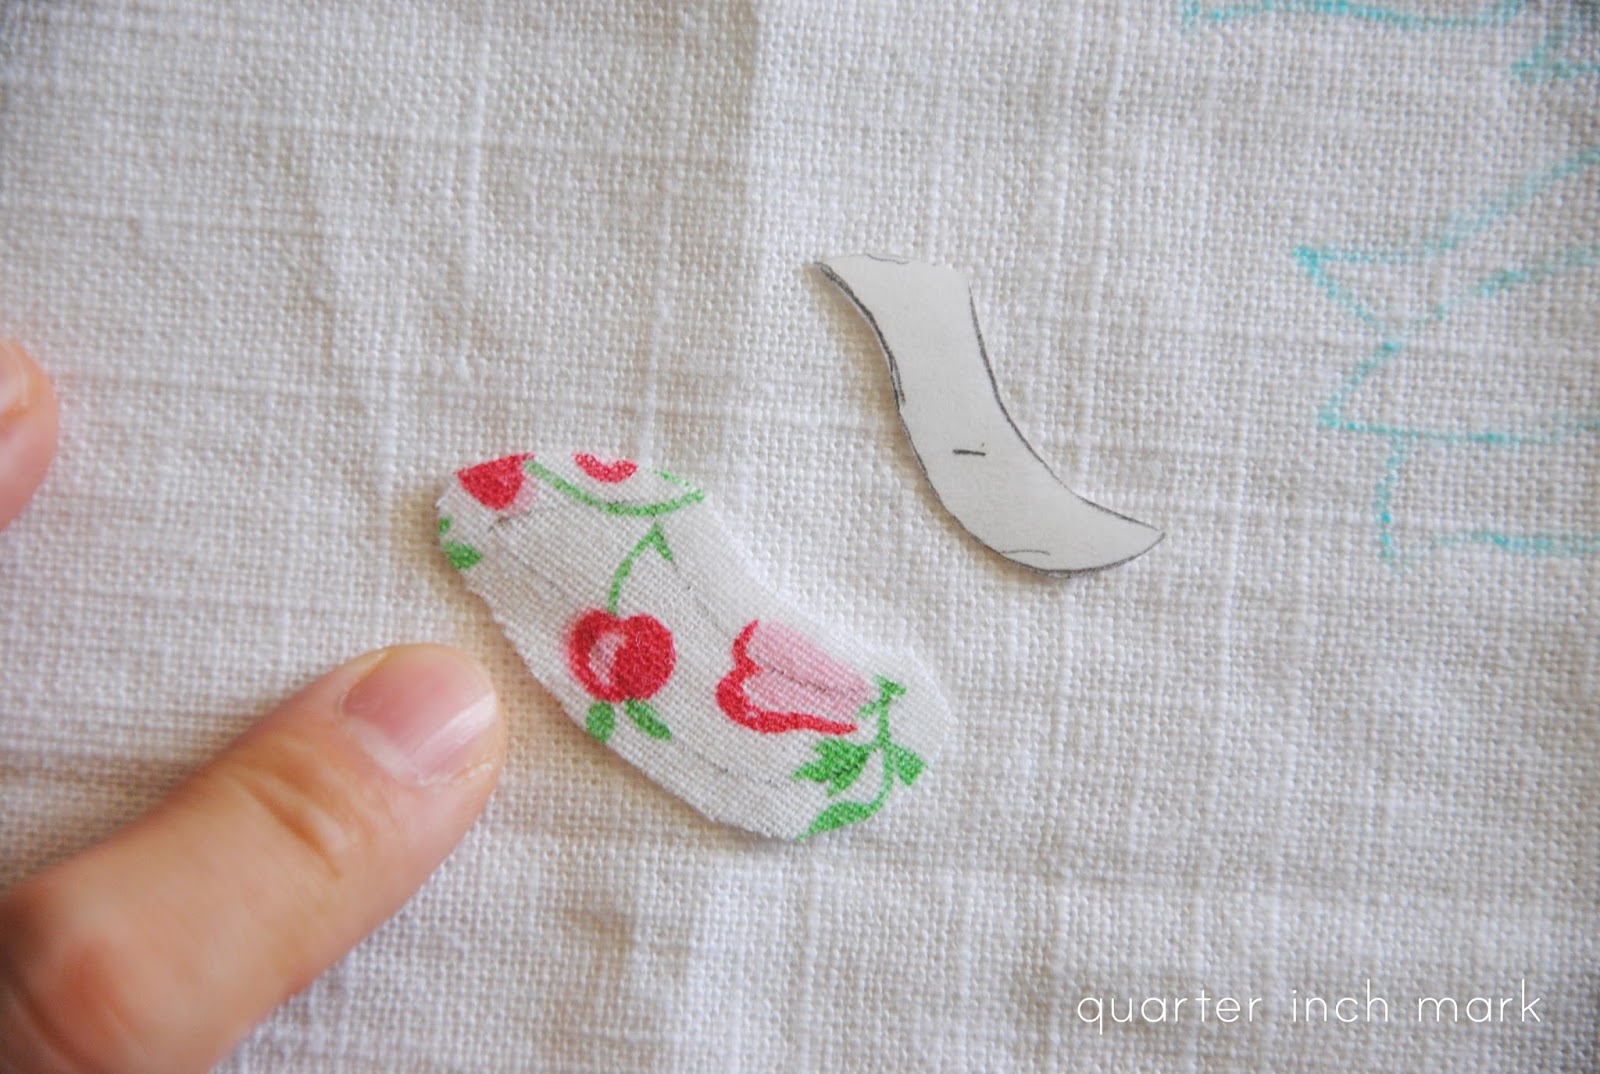
Step 10: This step might be slightly differ than others. I didn't like working with a freezer paper on top of the cloth, so I gently trace around the template with mechanical pen. So that leave the template shape on the cloth.

Step 11:  Place the appliqué piece on to the background cloth. On the Step 3, you've spent some time to trace the pattern onto the background cloth. This would allow you to place the appliqué piece to the correct place. ( A like drawing with black pen, now you are filling in with colors, but this time with cloth).  Use a small crystal pin to stab on the points of appliqué piece and background cloth, so they are match in place.

 Step 12: Insert the appliqué sharp needle behind the small appliqué piece. You can start anywhere, but I like to start from edge point.

 Step 13:  Gently use the needle point or finger to fold the line that you have mark from Step 10 

Step14: Start stitching.  Run the needle down through both layers of fabric. Then catch the thread from the preceding stitch under the tip of the needle. You'll follow along the drawn line and finish up the piece; gently pull the thread tight and repeat for all the pieces.

Step 15: Since there is a third piece that will cover on both side pieces. I left the edge close to center unstitch.

 Step 16: When finish, double knit the end.

 Step 17: Repeat step 10-16

 Step 18: Now when two pieces have down. It should look like this.

 Step 19: Add on the third appliqué piece to close up the unstitched edges.

 Repeat for all tulips appliqué pieces.

Step 20: When it comes with curvy appliqué piece.  You'll find a single traced freezer paper is not thick enough to make the curves show during ironing process. You can adhere two pieces freezer paper together before cut out the image or even layer three pieces freezer paper together, so it creates a "thicker" template.

 Step 21: Do the same for the center small circles

 Step 22: Place the freezer paper template on the WRONG side of the cloth with hot/warm iron.

Step 23: Cut 1/4" seam allowance around the cloth that adhered with freezer paper template. Gently make small cuts around the curves, but not too close to the template.

Step 24: Use tip of the mini iron and gently iron on the angles of the templates. It will take a few  ironing times. When you iron the appliqué cloth, use your finger as aid to fold down the edges down as well.

 Step 25: The appliqué piece should have some nice curves after good ironing.

Step 26: Making small circles. It is very similar to how make a small yo-yo, but only with a small piece of freezer paper inside. Make running stitches around the seam allowances (seam allowance need to be less than 1/4"}

 Step 27:  Gently iron the circles then really carefully pull the paper out.

Step 28: For curvy applique piece, I've always over done with using pins. I try to match up the appliqué piece and the background lines together.  I always use extra pins then take out pins as I work on. 

Insert the appliqué sharp needle behind the appliqué cloth ( Step 13) then start small hand stitches around the piece. Use appliqué needle points to tuck in any seam allowance that come out and use the needle point to shape the appliqué piece as you go along the process. 

Step 29:  Place the small circle on top of the finish curvy appliqué piece. Gently stitch along with circles.

Now, I'll continue to work on the piece and writing a second post on flower stems appliqué and show you more of this process along! Then a finish touch of how to frame the work. So stay turn for future post on hand appliqué.  I do believe that hand appliqué is truly something more about hands and stitches making. I used to not hide out all the hand stitch threads, but now I do have more application of seeing some small thread showing and that is part of the reason I use red thread, a more promising process to myself.

Enjoy

xxc


SaveSave

Monday, July 31, 2017

Slow Stitching Studio


As I worked on the new appliqué piece, I took notes on the sewing tools and materials frequently being use.   I though I'd write two separate posts about the hand-applique (or maybe narrow down to one). Would it be good idea to give some pros and cons on the tools I use?  Does any of you like hand appliqués?

The mini floral appliqué is finished at 3.5"x3.5". I had to scale it down, so it can fit into a 4"x6" frame. I did a couple test printings before finalized the size and love the end of piece! The challenge probably was making the small circles to be "rounded" before hand appliqué down. I decided to let the red stitches to be more seen and found this time. Lots Feedsacks fabrics are used and they are my favorites to work on hand appliqué. I'd also recommended light weight-cotton, Liberty London fabrics, and lawn fabrics are perfect, too.  Just a lot possibilities for the hand appliqué. You don't really need a large pieces for small shapes. The smallest pieces that I've worked on is 0.5"x 0.5". So you can save all the tiny scraps for it.

The floral appliqué that was finished a few weeks ago got framed after I got new frames from IKEA. This time, I have better luck on getting it into the frame. The linen that was use as background is white and I would really love to used snow white next time if I have access to some snow-white linen. It probably will give the piece more in-depth turnout.

Since last Fall, I've been getting back to hand appliqué more.  It is a slow stitching studio practice, but somehow I really enjoy sitting down and hand-stitching small pieces together. I am tickled have them finished and framed now. The second large hand appliqué piece that I made last year has been made into a {travel outbound bag} and have been use it for storing vintage patterns. It is a larger travel outbound bag and I would love to travel with it soon!

I've also had the second Honey Cowl off the needles and cast the third one on! This time, I used knit stitches and it goes really quick! Did you know, yarn stitching is so nice on the bus rides, waiting at the doctor's office and trip to Brooklyn. I've also got some new yarn from the sale section and have casted on the fourth cowl. I'll keep practicing until I am ready for a shawl and guess what? The pattern have been purchased and just need to sit down and learn the new stitching names and how. Of course, getting new yarns and fancy a shawl for this Fall.

{Shop Talk} 
Thank you again and again for your support and positively responds about the {Boathouse Pouch Sewing Pattern}. I hope you'll love the pattern and enjoy making it! I will be making a large custom order base on Boathouse pouch pattern and can hardly wait to start pulling fabrics out. I've made a set for my sister right after the finished the pattern writing.  The scooter print and the car print are just perfect for her!

Thank you all so much for taking your time and leave kindly commons on the patterns you have purchased. You know that means a lot to me as a designer and great impact on the feature patterns that I write and inputs to improve for as well, {Thank You}!

I've been working on another pattern and is almost ready transfer into a PDF formate, not bag nor pouch pattern this time. I've been acquired materials and fabric to work on different methods of piecing. The sewing pattern will be release in this upcoming Fall.  It is surely my Big Apple City life inspiration since I relocated here!  Stay turn.


more later...

xxc


Wednesday, July 5, 2017

Few favorites goodness...


Favorite i:  Focus on

It has been awhile since I last stitch on hand appliqué piece. It is such a treat project to start and end. It always allows me to focus, focus, focus; making tiny stitches, pulling fabrics out from bins, play hard, mixed and matched colors from scraps to large pieces, making pauses when I need, took a short walk between workroom and kitchen fridge, getting something cool to drink, cool of some steamy weather and mind.

still Favorite i:

Lately, I have been noticing how my hands work with small pieces. It is not just making, but how  I utilize my hands to create and how the interacting between me and the work I am making. I have had a lightbulb moment a few afternoons ago and was excited about this new concept that I like to explore more.

another Favorites i:

I switched the hand stitching thread after making the first two green leaves from white to red. Once a long time ago, I read a book and it was explaining using the red thread for hand appliqué and making it more visible. As the thread in representation of  describing time passage ( the time spend on making), the hand touch, and how actually imperfectness is part of how we make.

 Favorite i:

Pins are not my friends. I think I either bend them or drop them on the floor. I should just open the tool box and bring out the tiny appliqué pins, but I am just lazy to do it. I found it is interesting that I have used three different types of pin over last few years in sewing. My absolutely favorite pin is the crystal clear ball on the top! They are fine and comes two length! options are important!

Favorite i:

I love sitting down and rediscovering my sewing + thinking pattern. I actually can't really talk/ have a conversation while sew at the same time. I either need to focus on the sewing or drop sewing and just talk!


the end of the favorite i:

I've enjoyed good accomplishments, small accomplishments, time to self and sitting down reorganize and check off lists.


Favorite ii: New Friendship

I've been a lucky person around the sewing community. Meeting new friends mean talking and sharing love of patchwork and fabrics, never get old, trust me! These feedsack pieces arrived last week. I am still excited about these treasures shared to me from a new extended friendship. The textures, colors, and patterns of these feed sacks are one of a kind!  I'll be making more patchwork appliqués soon.

Favorite iii:  Perfect frame

That's my S, back in 2014 when I first published {kin-cha-ku sewing pattern}. She was the model and had blast playing all these kin-cha-ku samples. I've selected and printed some patchwork pieces in 4"x4" and was not able to find frames that come in that measurement. A few week ago, I stump into this cute picture frame. It is so perfect! I could change photos as I like.

 Favorite iiii: New Knitter

It has been my goal to learn to knit. I have had {Honey cowl knitting pattern} saved since 2012, but had not enough courage to try. I've always though I meet a knitting neighbors in the past and we could make few stitches at the time.

Back in June, I've been spent 10-15 minutes every night watch Youtube tutorials on making knitting stitches. I followed along and practiced as the the tutorials played. I've tried three times on the blue alpaca cowl.  The third try was better, so I kept it and finished up. Not perfect!

Favorite iiii:

Now, I have the second one started, but this is the second try. When I knit, I can't talk at all or have background sounds on. shhh..

Favorite iiii:

There are few stitches dropped on the second cowl attempt, but it is much improved from the first one. Gosh, both yarns were purchased in 2012, while still lived in N.D.

Favorite iiii:

You might want to stand few inches away from the screen. The last few rows didn't turn out correct. I was having a serious conversation and didn't count on the stitches and when to stop and make purl and slip stitch.  I decided to bind off the honey cowl anyway. I knew I'd feel encourage and proud that I knitted something.


Favorite iiii:

Loving that the {Forest Hill Knit Bag} is put in good use. I've been paying good attention to some yarn shops lately. I love to start a third honey cowl soon and perhaps a shawl.  I love being a new learner that brings excitements. I love learning from errors and fails during the process. Finding a better way to learn something new and do a happy dance at the end.


Favorite v: Something new coming soon

I've been working something new; fun, playful... stay turn


More later,

xxc