Wonky star is another great project for scraps and easy to make. It doesn't require to use perfect angle and you will be able to finish one wonky star in 10 minutes or less.
Each {Wonky star} needs 9 pieces of squares. Within this tutorial the squares are cut in 2"x2". You may vary your star size by cutting your squares in larger measurements for larger stars.
{Use 1/4" seam-allowance throughout the project}
-Cut 9 , 2"x2" fabric per a wonky star.
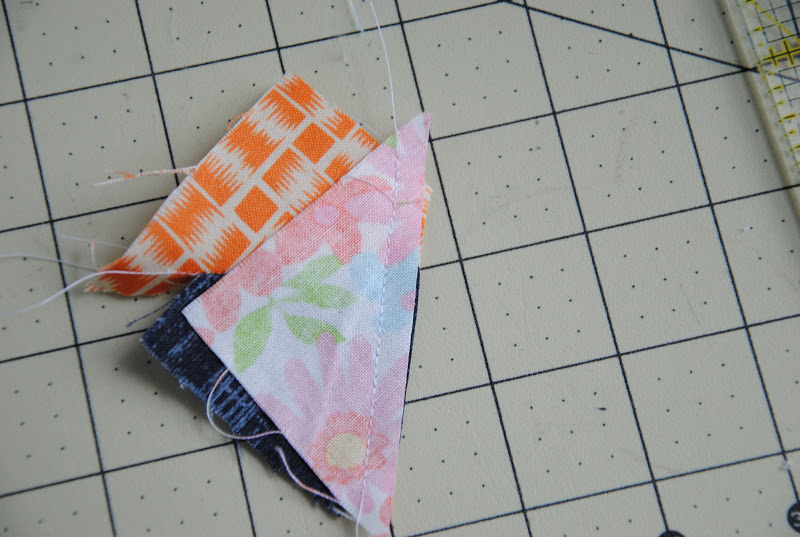
- Lay the triangle piece right side together on the 2"x2" square. Angles can be vary. The higher angles would have sharper points.
-Sew on the edge of the triangle.
-Trim the excess square piece off {show above}
-Open the back seam
-Take the second triangle piece
- Overlap the second piece of triangle on the first triangle and square.
- Sew on the edge of the second triangle
- Trim off excess fabric { show above}
- Your block would look like this after your first two joins.
- Press the seams open
- The piecing piece is larger than 2"x2" now. Trim it down to 2"x2". The starting point is from edge of the square then measure 2"down.
- Trim the three sides of the first block.
-
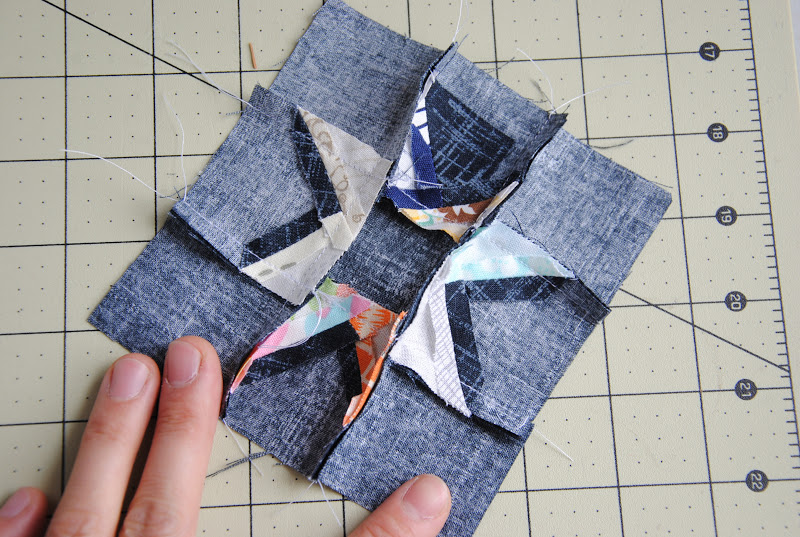
Repeat the other three blocks for one wonky star. Added 4 pieces of 2"x2" squares and arrange the layout {show above}.
- Join 3 pieces of 2"x2" blocks in row.
- There are three rows of joined pieces.
- Flip the seam; the oppose from each other.
- Join three rows together.
- Press the seams open in the back of block.
- Press from the front.
-
Trim around the four sides to perfect the square The block is measured 5"x5".
Please let me know if there is any part that's not clear. If you made anything base on this tutorial, please share your projects at
{made with 1/4" mark} flickr group. Can't wait to see what you make with this wonky star..
xxC


I love the look of your star! And I am definitely bookmarking this tute - thanks a bunch!
ReplyDeleteI am such a fan of wonky stars. Love these.
ReplyDeleteI really like your wonky stars...zippered pouch is lovely!
ReplyDeleteThanks for a great tutorial!
Love the Wonky Stars. Going to my monthly Quiltin with Friends this weekend. Will make this top there. Looks like a fun one....can talk while sewing! Thanks.
ReplyDeleteEnjoy your quilting time with your friends!
DeleteSoooooooooooooo love this technique, wonky is where I live and scrappy makes me uber happy, thanks so much!!!!!!!!!
ReplyDeleteLOVE it
ReplyDeleteI can't wait to try this myself with my fourth of July placemats that I plan to make.
ReplyDeleteI cannot wait to share this with my quilty friend! We love making stars! I am going to try this these this weekend. Thank you so much for sharing your tutorial!
ReplyDeleteHow big are the triangles?
ReplyDeleteLess than one inch.
DeleteI love the ones you have made so far. Thank you for the tutorial!
ReplyDeleteSuch a cute little block!! and a super clear tutorial - thanks!
ReplyDeleteLove the combined action of colors and how it looks crooked! Cute.
ReplyDelete