Pages

Friday, September 26, 2014

Patchwork Style Zippered Pouches


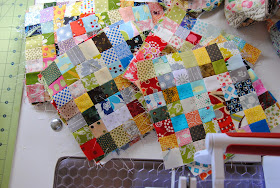
Hope you wouldn't mind today's self-promotion on these new patchwork style zippered pouches!  They are lovely and the colors are so cheerful! What I have done differently for these patchwork pieces is that they are pieced into a large patchwork piece then quilted straight line onto the cotton batting. The even and clean lines give the patchwork more focus look!

The sewing tapes and the zipper charms always give the pouches extra personality touches. The floral sewing ribbon was purchased in {M&J trimming}. It is a great place to shop for special trims, notions, ribbons, etc. The linen sewing tape definitely adds natural look to the pouch.

These patchwork style pouches are finished at 8"x5" and two of them are slightly larger, 8"x6". The size is perfect for multi-purpose. I have been using mine during traveling, going to meetings, stuff my sewing supplies in them and gifted to friends. They have added to my {Etsy Shop}.

Have you check into the {shop} lately? The {patchwork style checkbook covers} have added to the shop.  When we moved to the new city. I was so ready to make a new checkbook cover, but turns out I made more than two! Each checkbook cover comes with two pockets and each pocket holds one check book and one register book. It is hand-quilting throughout the exterior cover and the lining fabric is fused onto 100% cotton interfacing.

Enjoy,
Chase

Thursday, September 25, 2014

A mini quilt named Quilt Star


The { Quilt Star mini quilt} is completed! It was hard to decide where to stop on hand-quilting pattern; should it be allover? or should it be simple and leave some un-quilted space? I did few more line drawing with the Be-Gone pen, then let it sat for a few days. Then as the marking lines faded throughout the days I see it was unnecessary to do the overall hand-quilting.  I am pleased with the decision!

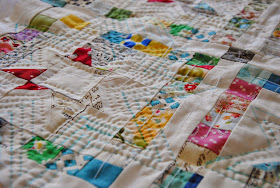
The overall star quilting pattern shows more after a few times of the water spared, {it got shrike a little}, but the texture leaves more in-depths in the mini. The un-even stars' shapes give so much dynamic. Oh, I sure love this accomplishment!

I must love Denyse Schmidt so much {actually I really do love her so much}! 10 out of 8 mini quilts I've made have used the DS fabric for the binding. I am so attract to the dottie fabrics, line fabrics, and of course picnic plaid for binding. Do you?

Remember the quilting label? Oh, yes! I went a bit extra fancy on this one! Extra embroidery touches and a 2" wonky star in the back! I simply signed with {handmade by chase} and date the month and the year. The extra effort and time on the quilting label is so worthy! Now, I could remember when I made it! I also have been thinking about, adding the location to the quilts, since we move from time to time.  Maybe add the city and the state? Um.. it would be another good question for me to think through.

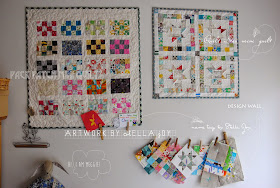
The Quilting Star mini is hanging next to the {pack patch mini}.  There are also lots little things in the studio walls as well.  I still see the plenty empty space in the studio walls; more minis are what the space needs ! Do you like minis?  I am {obsess} with them!

I couldn't help myself and doodled on the image! It surely turns out a bit different and new for myself and hope for you, too!

Quick update:
- Used Coats Cotton Quilting Thread 20 wt. for hand-quilting
- Clover between needle #12
- Warm and Natural Cotton batting, it is stiff for hand quilting, but I can't resist the look and the quality of it! You'll just need to find the right fit of thimble for your finger!
- Tutorial on hand-quilting {About hand-quilting post} 
xxc


Sunday, September 21, 2014

Weekending


The berry pie didn't make it to the weekending baking! It was warmer than we anticipated! Indeed, we had ice cream and top with homemade strawberry jam, um.. it felt like summer again!  We finished our bread, bacon, used half dozen eggs, finished up the last banana and last orange juice for breakfast dinner and watched a movie, actually two movies.  You all have guess right, our fridge is ready to get fill in again! We are looking forward a cooler week again; I can't wait to make creamy corn soup and the parmesan bread sticks that S has been asking for years { I haven't bake any bread for 3 years, since the oven we had in ND didn't work quiet right when we first move }.

On the S' quilt news: S' birthday quilt is almost ready! The backing fabric arrived a few weeks ago and finally cut and piece together this weekending. The quilt label/message is on the paper, but need a few edits before transfer on to the backing.  You know, I will finish the quilt before S turns 11 {still have a few months}. I can't wait to lay the birthday quilt on her bed and surprise her on a day when she hops herself back from the bus stop. That will be a fabulous day in her life and mine as well! Can't wait!

Do you remember my {Scrap Stamp Quilt} project started last year? Since this summer,  I have had short visits with {scrap stamp quilt}. The stamp box that started last year is still pretty full even though I add a few patchwork pieces weekly.  The piece is cut in 1.5"x1.5" and finished at 1'"x1". The plan for this project is a queen quilt, but I see two queen size quilts as I have add cut and add more as I go. Do you have a stamp box?  I might need a second box soon!

xxc


Friday, September 19, 2014

Tutorial: how to instal metal zipper

Often time, I get emails and comments on how I instal metal zipper? It is fairly simple and just take extra step to start. Once sewn a few metal zippers. You will have gain lots confident and will go quickLY in the process! I'd loved to share how I instal metal zipper. 

 - Prepare the exterior and interior pieces for the pouch and also the metal zipper.

 - You will need a zipper foot. Most of the sewing machine comes with a zipper foot.


-  The zipper that I prepared is 8" long, but it comes another half inch on both ends of the zipper, so that makes the zipper actually 9" long.

-  For both exterior and interior pieces measurement. I always plan on the 9" long that matches the length of the zipper.


 - Baste the zipper with 1/8" seam on the edge of the zipper and exterior pieces { This is personal preference}. Repeat for the opposite side of zipper side.
- If you are more experiences with instal zipper. This step can be eliminate.


 - Attach the zipper to the exterior pieces.
- Repeat for the lining pieces to the zipper .

-Press zipper seams; front {Exterior pieces} and back{ interior pieces}.

 - Top stitch 1/8" seam away from the zipper seam. It secures the zipper in place and pouch-to-be.
 - Enlarge the sewing stitch length.

- Check on the top-stitches you made. 


-Now, try to unzip the zipper. 
-Check it pull up and down smoothly. 

-Place the exterior and interior pieces RIGHT side together. 

- Line the edges of zipper ends FIRST then pin together. Repeat for the other zipper end. 

-Pin around the RIGHT side facing exterior and interior pieces together.
-Change sewing foot to regular sewing foot and set the 1/4" seam allowance. Start sewing from lining side. Leave a 3" opening on the lining side un-sew. This is the space where you will pull the pieces inside out.
-Sew around the preimeter of the pouch.


 -Clip four corners of the pouch corners then pull the pieces out from the 3" un-sew space in the lining side.

 -Finish the un-sew 3" opening with ladder stitch or machine sewing.


 After finished the zippered pouch, smooth out the zipper ends with a few pull and adjustments to make sure it close nicely.


This 8"x5" Patchwork style zippered pouch has added to my {Etsy Shop} . {SOLD}

Enjoy,
xxc


Thursday, September 18, 2014

It continues to grow!


I bring {Quilting Stars mini} with me whenever I wait for S in the music lessons. It is going a little slower than I like.  The quilting spacing around the star is 1/4" apart and I do love how it is turning out so far! I plan on clean the Be-Gone Pen marking after finish the four stars, then mark straight lines {about 1/2"} for the space between each star.   The binding fabric has already been pick out and the wall space for this mini is ready for her! It will take few more music lessons for sure!

Tomorrow, I have a simple {{how to install metal zipper tutorial}} for you! There are few photos editing to follow up, so I could be clear as I share with you how I install metal zipper!

xxc


Tuesday, September 16, 2014

Sew update!


My {sew tiny} pieces have transformed into zippered pouches. The wonky star pouches have been shipped last week. After my first attempt quilting on linen in the wider spacing {1" wide}, I wasn't satisfy with the outcome. So, I decided to leave these patchwork un-quilt.  The simplicity look of them really shine the wonky stars and the linen that I used was purchased in Japan last summer. It was 4 meters long from the prepackage. It has been so nice to work with; especially the texture is soft and allow to create natural look for the patchwork pieces.

The second {sew tiny} pouch is smaller. The front and back has eight different patchwork sewing blocks. The pouch finished in 5.5"x5.5" and lined with 100% Japanese cotton fabric! This zippered pouch has added to the my {Etsy Shop}. Sold 

These simple one piece cloth zippered pouches were made before our move for a craft show.  I was so surprised that customers prefer the patchwork style of pouches than the one piece cloth. These pouches were made in simple cut design then added the leather for the embellishment to give the pouch a bit more personality. I have a few didn't get to bring home with and have add to the {Studio Sale} with a 20% off in the {Etsy Shop}.


Enjoy

xxc